Part 1: Introduction to Styling Tables
You’ve probably heard the mantra “tables are for tabular data, not layout.” Originally designed to display tabular data correctly in HTML documents, they were soon misappropriated as a way to lay out complex web pages.
Tables can (and should) still be used for their true purpose—that of displaying tabular data. In this lesson we learn how to style tables to make them more attractive and more usable or accessible.
Tabular data is information that’s displayed in a table, and which may be logically arranged into columns and rows.
Before we can get started, you need to download the following file. Once you decompress the file, open it in both a text editor and in your browser.
| table_1.html.zip |
|
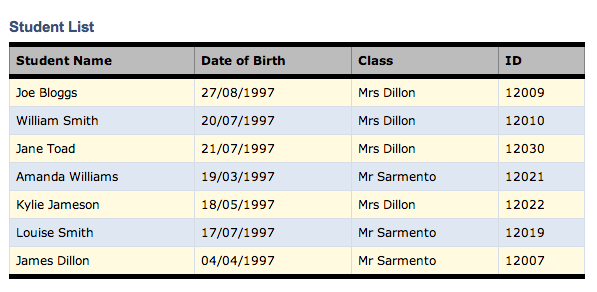
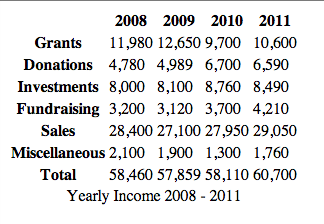
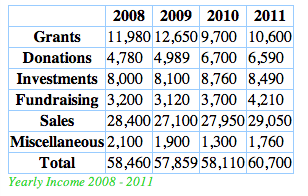
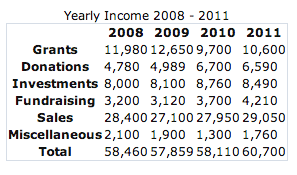
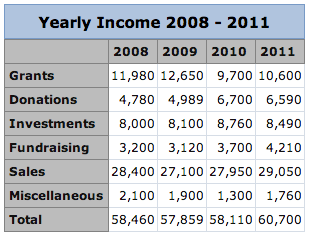
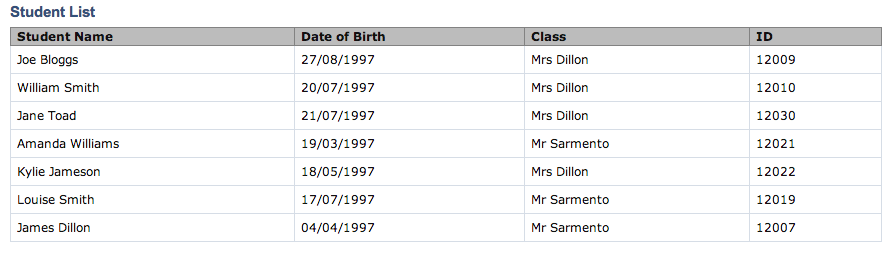
When you view it in the browser, you should see the following.
Obviously, this is tabular data. We see column and row headings to which the data in each cell relates. However, if we are honest, the headings don't really stand out. |
|
Table Headings
In our table, the row and column headings don't really stand out from the rest of the data in the table. Thankfully, there is an easy fix. The <th> element.
The th element identifies data that’s a row or column heading. As our table will contain both row and column headings and, to ensure that this is clear, we use the scope attribute of the <th> tag. The scope attribute shows whether a given heading is applied to the column (col) or row (row).
For example:
- To modify the 2008 to be a column heading we simply change the <td> tag to <th> and add the scope of col
<th scope="col">2008</th> - Similarly, to modify the Grants to be a row heading we simply change the <td> tag to <th> and add the scope of row
<th scope="row">Grants</th> - Don't forget to change those closing </td> into </th>
|
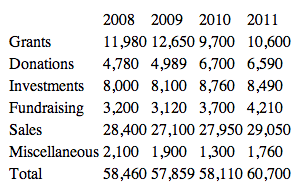
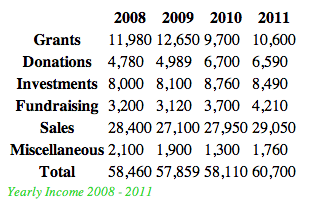
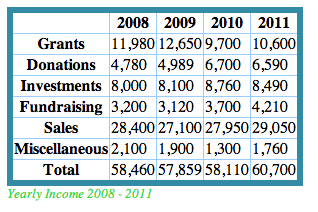
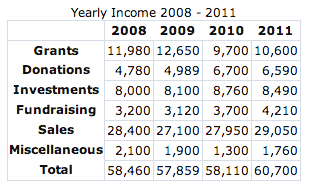
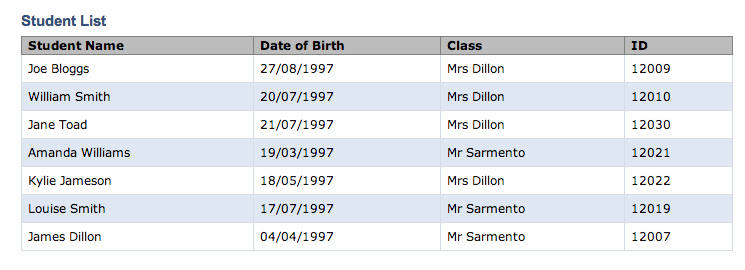
You will notice that both the 2008 and Grants have been turned into headings.
At first glance, you should see that headings automatically center the text and bold it. Your task: modify your code to create all of the table and row headings. |
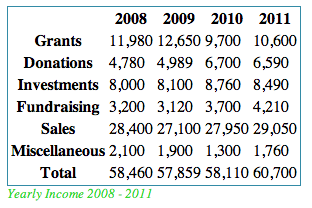
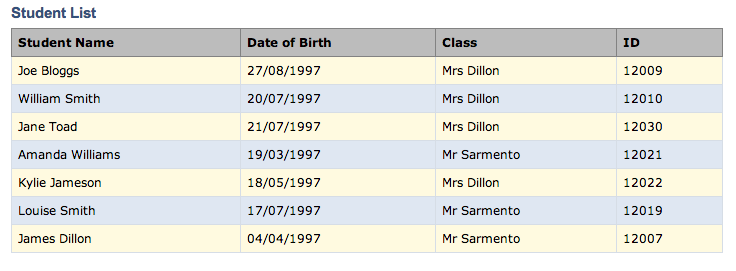
If you have done things right, your table should now look something like this:
The <caption> element
The caption element adds a caption to the table. Why might you want to use a caption instead of just adding a heading or paragraph text for display with the table? By using a caption, you can ensure that the text is tied to the table, and that it’s recognized as the table’s caption; there’s no chance that the screen reader could interpret it as a separate element. If you want your table captions to display as paragraph text or level-three headings in a graphical browser, no problem! You can create CSS rules for captions just as you would for any other element. More on this later.
Immediately after your <table> element that starts your table and before the first row, add the following code to create a simple caption:
Note: The <caption> tag must be inserted immediately after the <table> tag and you can specify only one caption per table.
<caption>
Yearly Income 2008 - 2011
</caption>
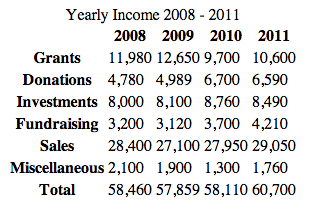
By default, you will notice that your browsers displays the caption centered above the table in a very boring and simple font. but with a little CSS, we can reposition the caption to the bottom in relation to the table and make it stand out a little more.
For instance, we can manually set the position of the caption in relation to the table using the caption-side CSS property with the possible values being top or bottom:
table
{
caption-side: bottom;
}
Note: to do this, you will either need to use an external style sheet, or an internal style section within the head portion of your document. To create an internal style sheet, simply modify your head section as follows:
Immediately after your <table> element that starts your table and before the first row, add the following code to create a simple caption:
Note: The <caption> tag must be inserted immediately after the <table> tag and you can specify only one caption per table.
<caption>
Yearly Income 2008 - 2011
</caption>
By default, you will notice that your browsers displays the caption centered above the table in a very boring and simple font. but with a little CSS, we can reposition the caption to the bottom in relation to the table and make it stand out a little more.
For instance, we can manually set the position of the caption in relation to the table using the caption-side CSS property with the possible values being top or bottom:
table
{
caption-side: bottom;
}
Note: to do this, you will either need to use an external style sheet, or an internal style section within the head portion of your document. To create an internal style sheet, simply modify your head section as follows:
|
<head>
<meta charset="utf-8" /> <title>Basic Table</title> <style> table { caption-side: bottom; } </style> </head> |
|
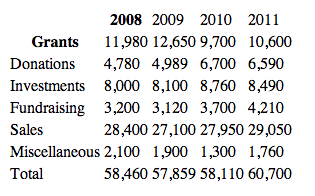
Note how the caption now appears below the tabular data.
Similarly, the CSS property text-align can be used to align the caption in relation to the table.
Possible values for text-align include: left, right, center, and justify.
Be careful where you put the text-align rule. In this case we only want to apply it to the caption and not all the data in the table. To avoid any mishaps, the easiest thing to do is to create a separate rule for the caption within the style section.
|
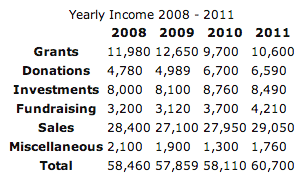
caption { text-align: left; font-style: italic; font-size: smaller;color: #33dd33; } To make things interesting, I have also created properties to control the style, size, and color of the caption. |
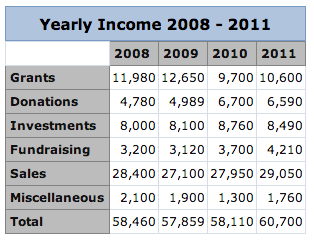
Adding Borders to a Table
You can add borders to tables just as you can with other HTML elements. Borders are particularly useful for tables, as they help to make the data understandable. For instance, including the border property within your table rule, would apply a one-pixel, light-blue border around your table.
|
table
{ caption-side: bottom; border: 1px solid #338ba6; } |
|
|
You can also add borders to individual cells. This style rule renders a slightly lighter border around td and th table cells:
td, th { border: 1px solid #99ccff; } |
By experimenting with CSS borders on your tables, you can create many appealing effects-- even if the data contained within is dull! You can use differently colored borders for table headings and table cells, and apply various thicknesses and styles of border to table cells. You might even try out such tricks as using one shade for top and left borders, and another for bottom and right borders, to create an indented effect.
We can apply a range of values to the CSS border-style property. We’ve already met solid, which displays a solid line as the border. Here are some of the other options.
We can apply a range of values to the CSS border-style property. We’ve already met solid, which displays a solid line as the border. Here are some of the other options.
double
groove
inset
outset
ridge
solid
dashed
dotted
none
CSS attributes make the styling of data tables simple and quick. For instance, when I begin a new site on which I know I’ll have to use a lot of data tables, I create a style rule with the class selector .datatable; this contains the basic styles that I want to affect all data tables, and can easily be applied to the table tag of each. I then create style rules for .datatable th (the heading cells), .datatable td (the regular cells), and .datatable caption (the table captions).
From that point, adding a new table is easy. All the styles are there—I just need to apply the datatable class. If I decide to change the styles after I’ve created all the tables in my site, I simply edit my stylesheet.
From that point, adding a new table is easy. All the styles are there—I just need to apply the datatable class. If I decide to change the styles after I’ve created all the tables in my site, I simply edit my stylesheet.
How do I stop spaces appearing between the cells of my tables when I’ve added borders using CSS?
In the previous solution, after adding a border to the th and td elements, you can see ithat there are gaps between the borders applied to each cell. Simply setting margin or padding to 0 won’ t remove this space. The only way to remove the spaces between the cells is by setting the value of the border-collapse property to collapse :
|
table
{ caption-side: bottom; border: 1px solid #338ba6; border-collapse: collapse; } |
|
|
Oops! Looks like our outer border is no longer distinguishable from the inner grid lines.
The easiest way to fix this would be to adjust the size of the main table border. (For instance from 1px to 6px) table { caption-side: bottom; border: 6px solid #338ba6; border-collapse: collapse; } |
Now that you have finished part 1, be sure to post the finished work so it is viewable from your weebly site.
Part 2: Making a More Attractive and Readable Table
Before we can get started, you need to download the following file. Once you decompress the file, open it in both a text editor and in your browser. Yup... it is almost like the file we started with at the beginning.
|
| ||
The HTML table is the best way to structure spreadsheet data, even though its default appearance is unattractive. Luckily, we can style the table using CSS, which keeps markup to a minimum and allows us to control our data table’s appearance.
|
First lets create a rule within the <style> section that applies some basic properties to the entire page.
<style> body { background-color: #fff; color: #111; font-family: Verdana, Tahoma, sans-serif; font-size: 0.75em; } </style> Hopefully you can appreciate how different it is already and see that we controlled the background color of the page, the color of the text, the font used, and the font size. To learn more about this check out w3c schools. |
|
First: let's create a rule that styles the table as a whole, setting the borders to collapse:
table { border: 1px solid #d6dde6; border-collapse: collapse; } As we’ve already seen, border displays a border around the outside of the table,while border-collapse removes spaces between the table’s cells. |
|
|
Next, let's turn our attention to the <td> table cells (not the headings)
td { border: 1px solid #d6dde6; text-align: right; padding: 0.2em; } You can see that our rule added a border to the table cells and used text-align to right-align their contents for that “spreadsheety” look. You can see a border around each cell in the table (except the header cells). |
|
Next, we are going to create a rule to style the <th>(heading) cells.
th { border: 1px solid #828282; background-color: #bcbcbc; text-align: left; padding: 0.4em; } You can see that we applied a darker color for this border and added a background color to these cells to highlight that they’re headings rather than regular cells. In addition, we controlled the alignment of the text to make everything stand out a bit more, and a bit of padding so everything isn't so squished within the cells. |
|
|
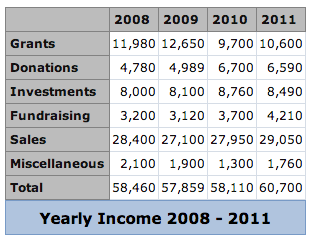
Next, we want to style the caption to make it look visually part of the table.
caption { font-size: 125%; font-weight: bold; background-color: #b0c4de; color: #000000; padding: 0.5em 0 0.5em 0; border: 1px solid #789ac6; } Notice how we styled the font size and weight to make the title or caption stand out more, the background and font colors to make the caption pop, modified the border and padding to tweak things further. (If you look carefully, you will see that padding was written differently, this is because we controlled the top, right, bottom, and left padding individually. See if you can figure out which position represents each side. |
|
Things seem a little odd because of that white cell in the middle of nowhere (just under the caption)
How do we fix it? If you look really carefully, you will see that in the first row of the table, one of the cells was defined using the <td> tag and not the <th> tag. Do a quick change, and presto. |
|
Let's Recap: Wow! Things sure look different!
|
Before:

|
After:

|
Modified: (Hmmm....)
|
There are a lot more things that we could do to this table to make it even more appealing and useful. However, I hope you appreciate the power of CSS in styling basic tables so that don't look quite so boring.
Now that you have finished part 2, be sure to post the finished work so it is viewable from your weebly site.
Part 3: How Do I Display Table Rows In Alternating Colors?
It can be difficult to stay on a particular row as your eyes work across a large table of data. Displaying table rows in alternating colors is a common way to help users stay focused on the row they’re on.
Using the CSS3 nth-child selector, we will learn to add a different style to every other row without needing to add anything to the markup.
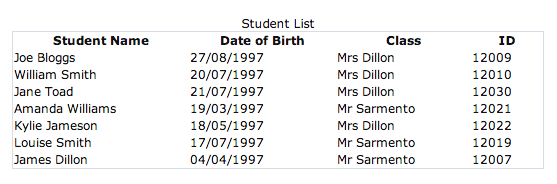
Before we can get started, you need to download the following file. Once you decompress the file, open it in both a text editor and in your browser.
Using the CSS3 nth-child selector, we will learn to add a different style to every other row without needing to add anything to the markup.
Before we can get started, you need to download the following file. Once you decompress the file, open it in both a text editor and in your browser.
|

| ||

|
First, as we did in the previous example, lets create a rule within the <style> section that applies some basic properties to the entire page. Note we used the margin attribute or property to move the data away from the edges.
<style> body { background-color: #fff; color: #111; font-family: Verdana, Tahoma, sans-serif; font-size: 0.75em; margin: 50px; } </style> |
|
As we did previously, create a rule that styles the table as a whole, setting the borders to collapse. This time, let's set the total width of the table to 80% of the current window:
table { width: 80%; border: 1px solid #d6dde6; border-collapse: collapse; } Try resizing the browser window and observing what happens to the size of the table. |
|
As we did in part 2, we can easily style the table heading cells <th> and the remaining cells <td> using basic CSS.
td
{
border: 1px solid #d6dde6;
padding: 0.5em;
}
th
{
border: 1px solid #828282;
background-color: #bcbcbc;
text-align: left;
padding-left: 0.5em;
}
td
{
border: 1px solid #d6dde6;
padding: 0.5em;
}
th
{
border: 1px solid #828282;
background-color: #bcbcbc;
text-align: left;
padding-left: 0.5em;
}
Now we want to style the caption to make it a bit more appealing.
caption {
font-size: 125%;
font-weight: bold;
font-family: Arial, Helvetica, sans-serif;
color: #33517a;
text-align: left;
padding: 0.5em 0 0.5em 0;
}
Alternatively, we could replace font weight, size, and family by combining them in a single attribute or property
so the caption rule would now be simplified to the following:
caption {
font: bold 125% Arial, Helvetica, sans-serif;
color: #33517a;
text-align: left;
padding: 0.5em 0 0.5em 0;
}
caption {
font-size: 125%;
font-weight: bold;
font-family: Arial, Helvetica, sans-serif;
color: #33517a;
text-align: left;
padding: 0.5em 0 0.5em 0;
}
Alternatively, we could replace font weight, size, and family by combining them in a single attribute or property
- font: bold 125% Arial, Helvetica, sans-serif;
so the caption rule would now be simplified to the following:
caption {
font: bold 125% Arial, Helvetica, sans-serif;
color: #33517a;
text-align: left;
padding: 0.5em 0 0.5em 0;
}
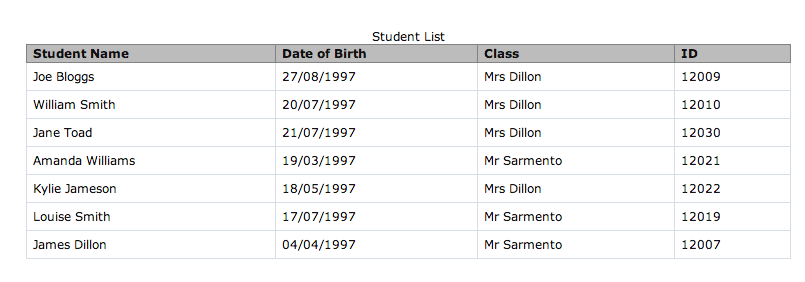
Finally, time to attack those alternating rows! The nth-child selector makes it very easy to target the odd and even rows in your table using the keywords odd and even:
tr:nth-child(odd)
{
background-color: #dfe7f2;
color: #000000;
}
tr:nth-child(odd)
{
background-color: #dfe7f2;
color: #000000;
}
Alternatively or in addition, we could create a rule to control the even rows.
tr:nth-child(even)
{
background-color: #fffae0;
color: #000000;
}
Note: I also adjusted the padding in the <th> so the heading row matched the height of the other rows more closely.
tr:nth-child(even)
{
background-color: #fffae0;
color: #000000;
}
Note: I also adjusted the padding in the <th> so the heading row matched the height of the other rows more closely.
Discussion Item: (You can try this in a copy of your page if you would like)
Prior to widespread support for this n-th child selector, we’d have to add a class to every other row and then use the class to target the row:
The alternating table rows <tr>would have to be modified similar to <tr class="altrow">. Not very fun if our table had dozens of rows. And what about if we later decided to add or delete entire rows. The entire table could get pretty messed up in a big hurry. Not very appealing when the rows don't alternate as we intended.
Then we would have to create a rule similar to the following:
tr.altrow
{
background-color: #dfe7f2;
color: #000;
}
If we wanted to apply styles to both the even and the odd rows, we would need to create a second class and apply it accordingly. Tonnes of extra coding required.
If you want to see an example of what this code might look like, check out:
http://www.w3schools.com/css/tryit.asp?filename=trycss_table_fancy
As you can see, this is a whole lot more work. So thankfully, CSS and HTML5 adapted to make things a lot easier. Be aware though that some older browsers might not support the n-th child selector
Let's Recap And Take A Look At The Difference!
Before
After:

It's amazing how much more professional this second table looks.
Now that you have finished part 3, be sure to post the finished work so it is viewable from your weebly site.
Now that you have finished part 3, be sure to post the finished work so it is viewable from your weebly site.
For those of you who are interested, besides nth-child, there are also first-child and last-child.
For instance, if I added the following two rules, look how different the table looks again.
tr:last-child
{
border-bottom: 5px solid #000000;
}
tr:first-child
{
border-bottom: 5px solid #000000;
border-top: 5px solid #000000;
}
For instance, if I added the following two rules, look how different the table looks again.
tr:last-child
{
border-bottom: 5px solid #000000;
}
tr:first-child
{
border-bottom: 5px solid #000000;
border-top: 5px solid #000000;
}